
How to Track Events with Adobe DTM
A tag management system is designed to help manage the lifecycle of e-marketing tags (sometimes referred to as tracking pixels or web beacons), which are used to integrate third-party software into digital properties. Adobe's Dynamic Tag Management, or DTM, is one of the most notable of the various tag management softwares out there.
If you're using DTM, you'll probably include some sort of JSON on your page with information about the page (in this example it will be a JSON called 'digitalData') and you'll typically include the SatelliteLib script somewhere on the page and at the very bottom of the page you'll fire some event to indicate that the page is loaded like so:
<script async src="//assets.adobedtm.com/3469f5db1bb7fc0541f685581d1c26df48a471/satelliteLib-1b516774c55f2348f8855039378833c5b1122134.js"></script>

<script type="text/javascript">
     var _satelliteQ = _satelliteQ || [];
     _satelliteQ.push(function() {
         if(_satellite.pageBottomFired) return;
         _satellite.pageBottom();
     })
</script>
That's the basic setup of your tracking for the page impressions (note that there is obviously some configuration on the DTM side). But in addition to impression tracking, you'll likely have some events you'd like to track such as clicks or other user interactions. Open up your DTM webapp and sign in at https://dtm.adobe.com. Then select your tracking suite (you may want to set up a staging or test suite while developing).
1.
Click the "Rules" tab.
2.
Select "Direct Call Rules"
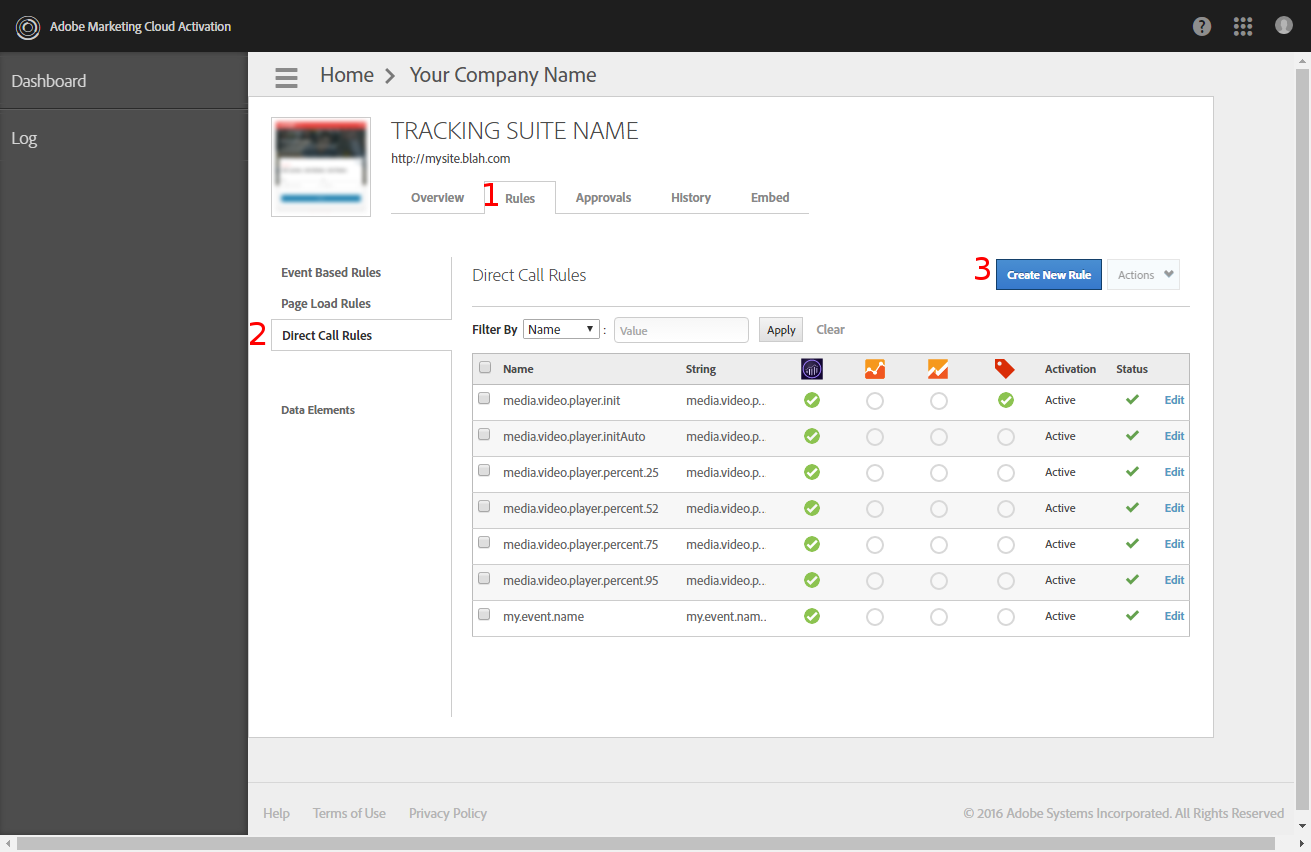
3.
Click the "Create New Rule" button.
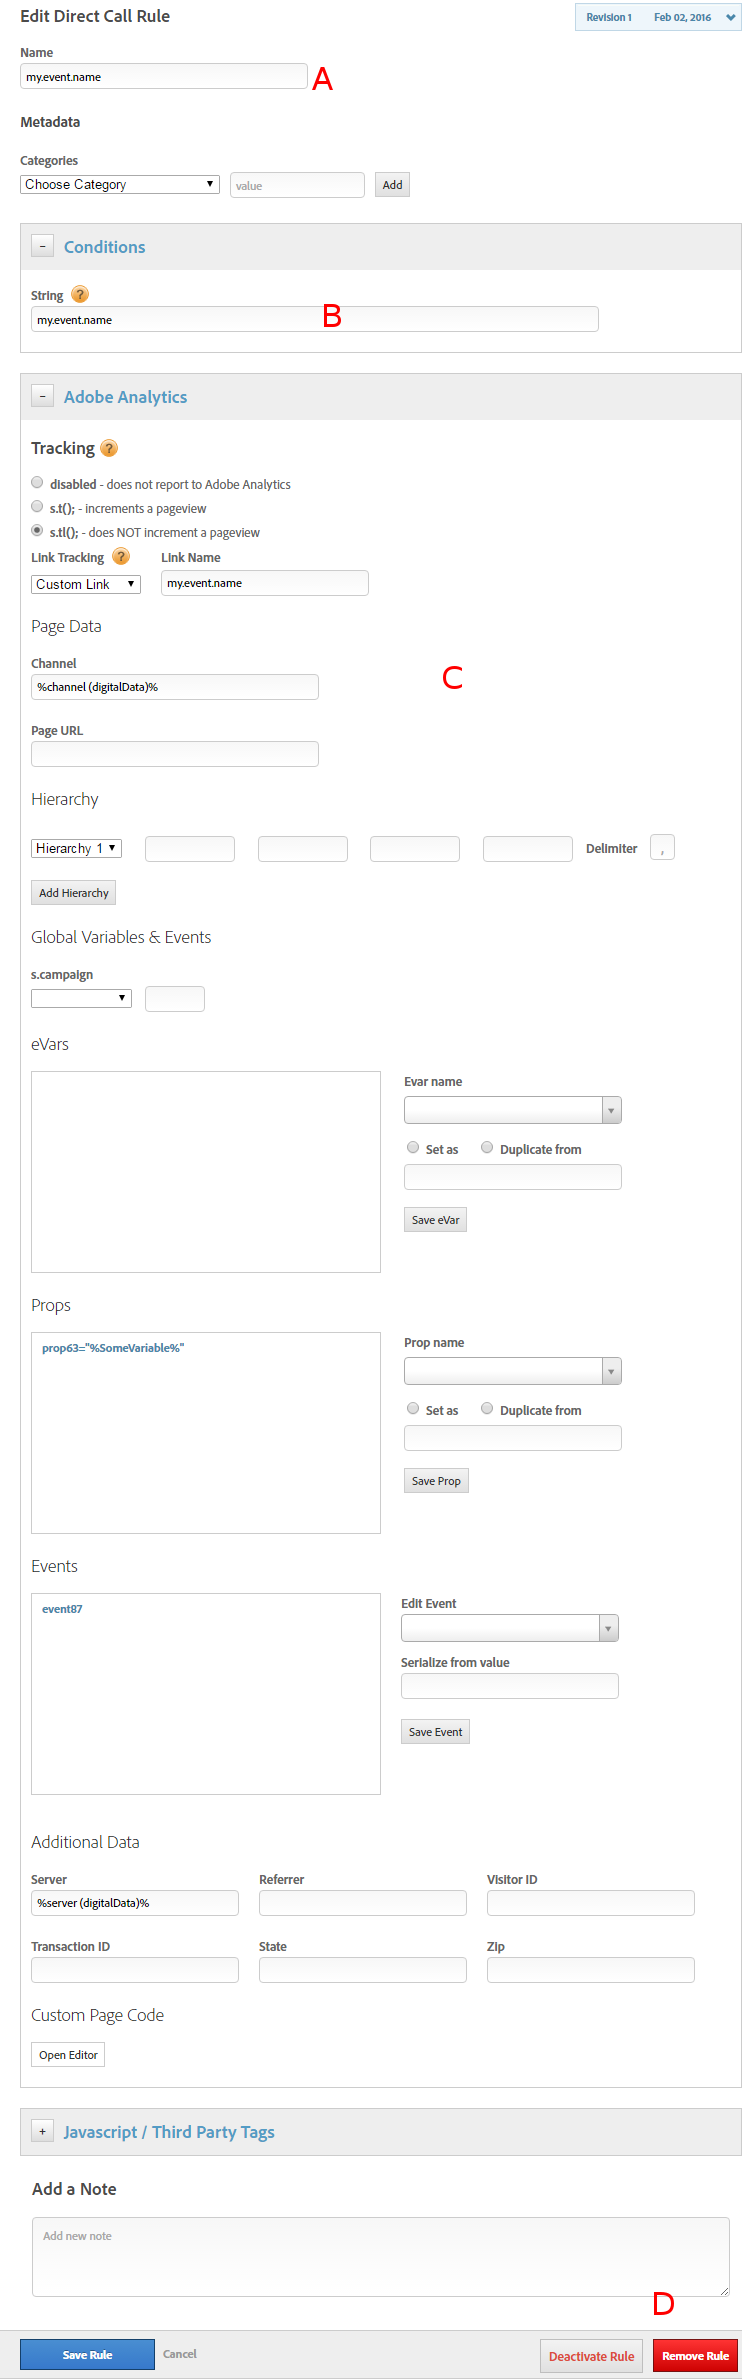
- Give the rule a name. This is just what it shows in the list of rules.
- Give it a condition. This is the name of the event which will be triggered via JavaScript
- Add the details you want to track. First specify if this event should trigger an increase in the page view count, add the eVars, properties, and events. You can reference data from the DigitalData JSON like this:
%server (digitalData)% - Click "Save Rule"
4.
Next go to the "Approvals" tab (see image on step 2. Its right next to the "Rules" tab).
5.
Select the rule you added and click "Approve" (requires approver privileges).
6.
Go to the "History" tab (right next to the "Approvals" tab).
7.
Click "Publish Queue" (requires publisher privileges).
Now you need to add the actual event tracking code to your pages. You can easily track your custom events using the SatelliteLib in much the same way you would use a message bus library such as Mediator:
_satellite.track('my.event.name'); //where 'my.event.name' is the string you set for "Condition"You can additionally set and reference variables using _satellite.setVar(name, value) and then reference them in the tag manager in the same way as DigitalData values using the format '%varName%'. Note that variable names cannot contain a dot in them, but spaces are fine. Here's an example how to send some additional data with an event:
_satellite.setVar('SomeVariable', '300 dollars'); //In the tag manager you can reference this with %SomeVariable%
_satellite.track('my.event.name');